When we built our home four years ago, one of the first updates I made was to convert a portion of our backyard into a garden. I made four raised beds (very necessary where we live because being close to the coast means that the soil is pretty sandy), and I grow almost everything from seed. The intention was to be able to personally source as much of what we eat as possible. I use only organic fertilizers and absolutely no pesticides, so I know that when I feed my family from our garden, we’re putting only good things in our bodies. Plus, by growing almost everything from seed, our home garden represents a sizable saving on the amount we spend on produce (I haven’t bought salad greens, tomatoes, or peppers in over a year).

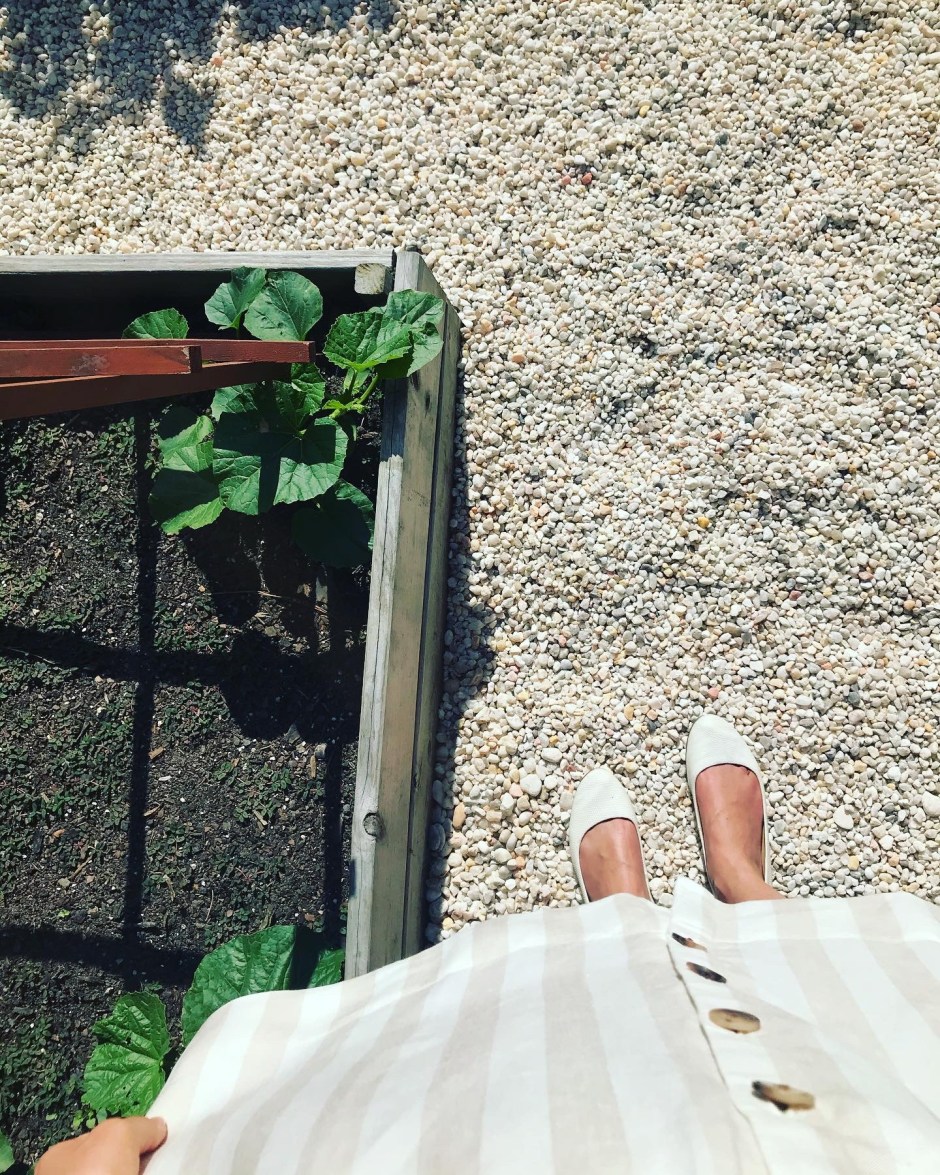
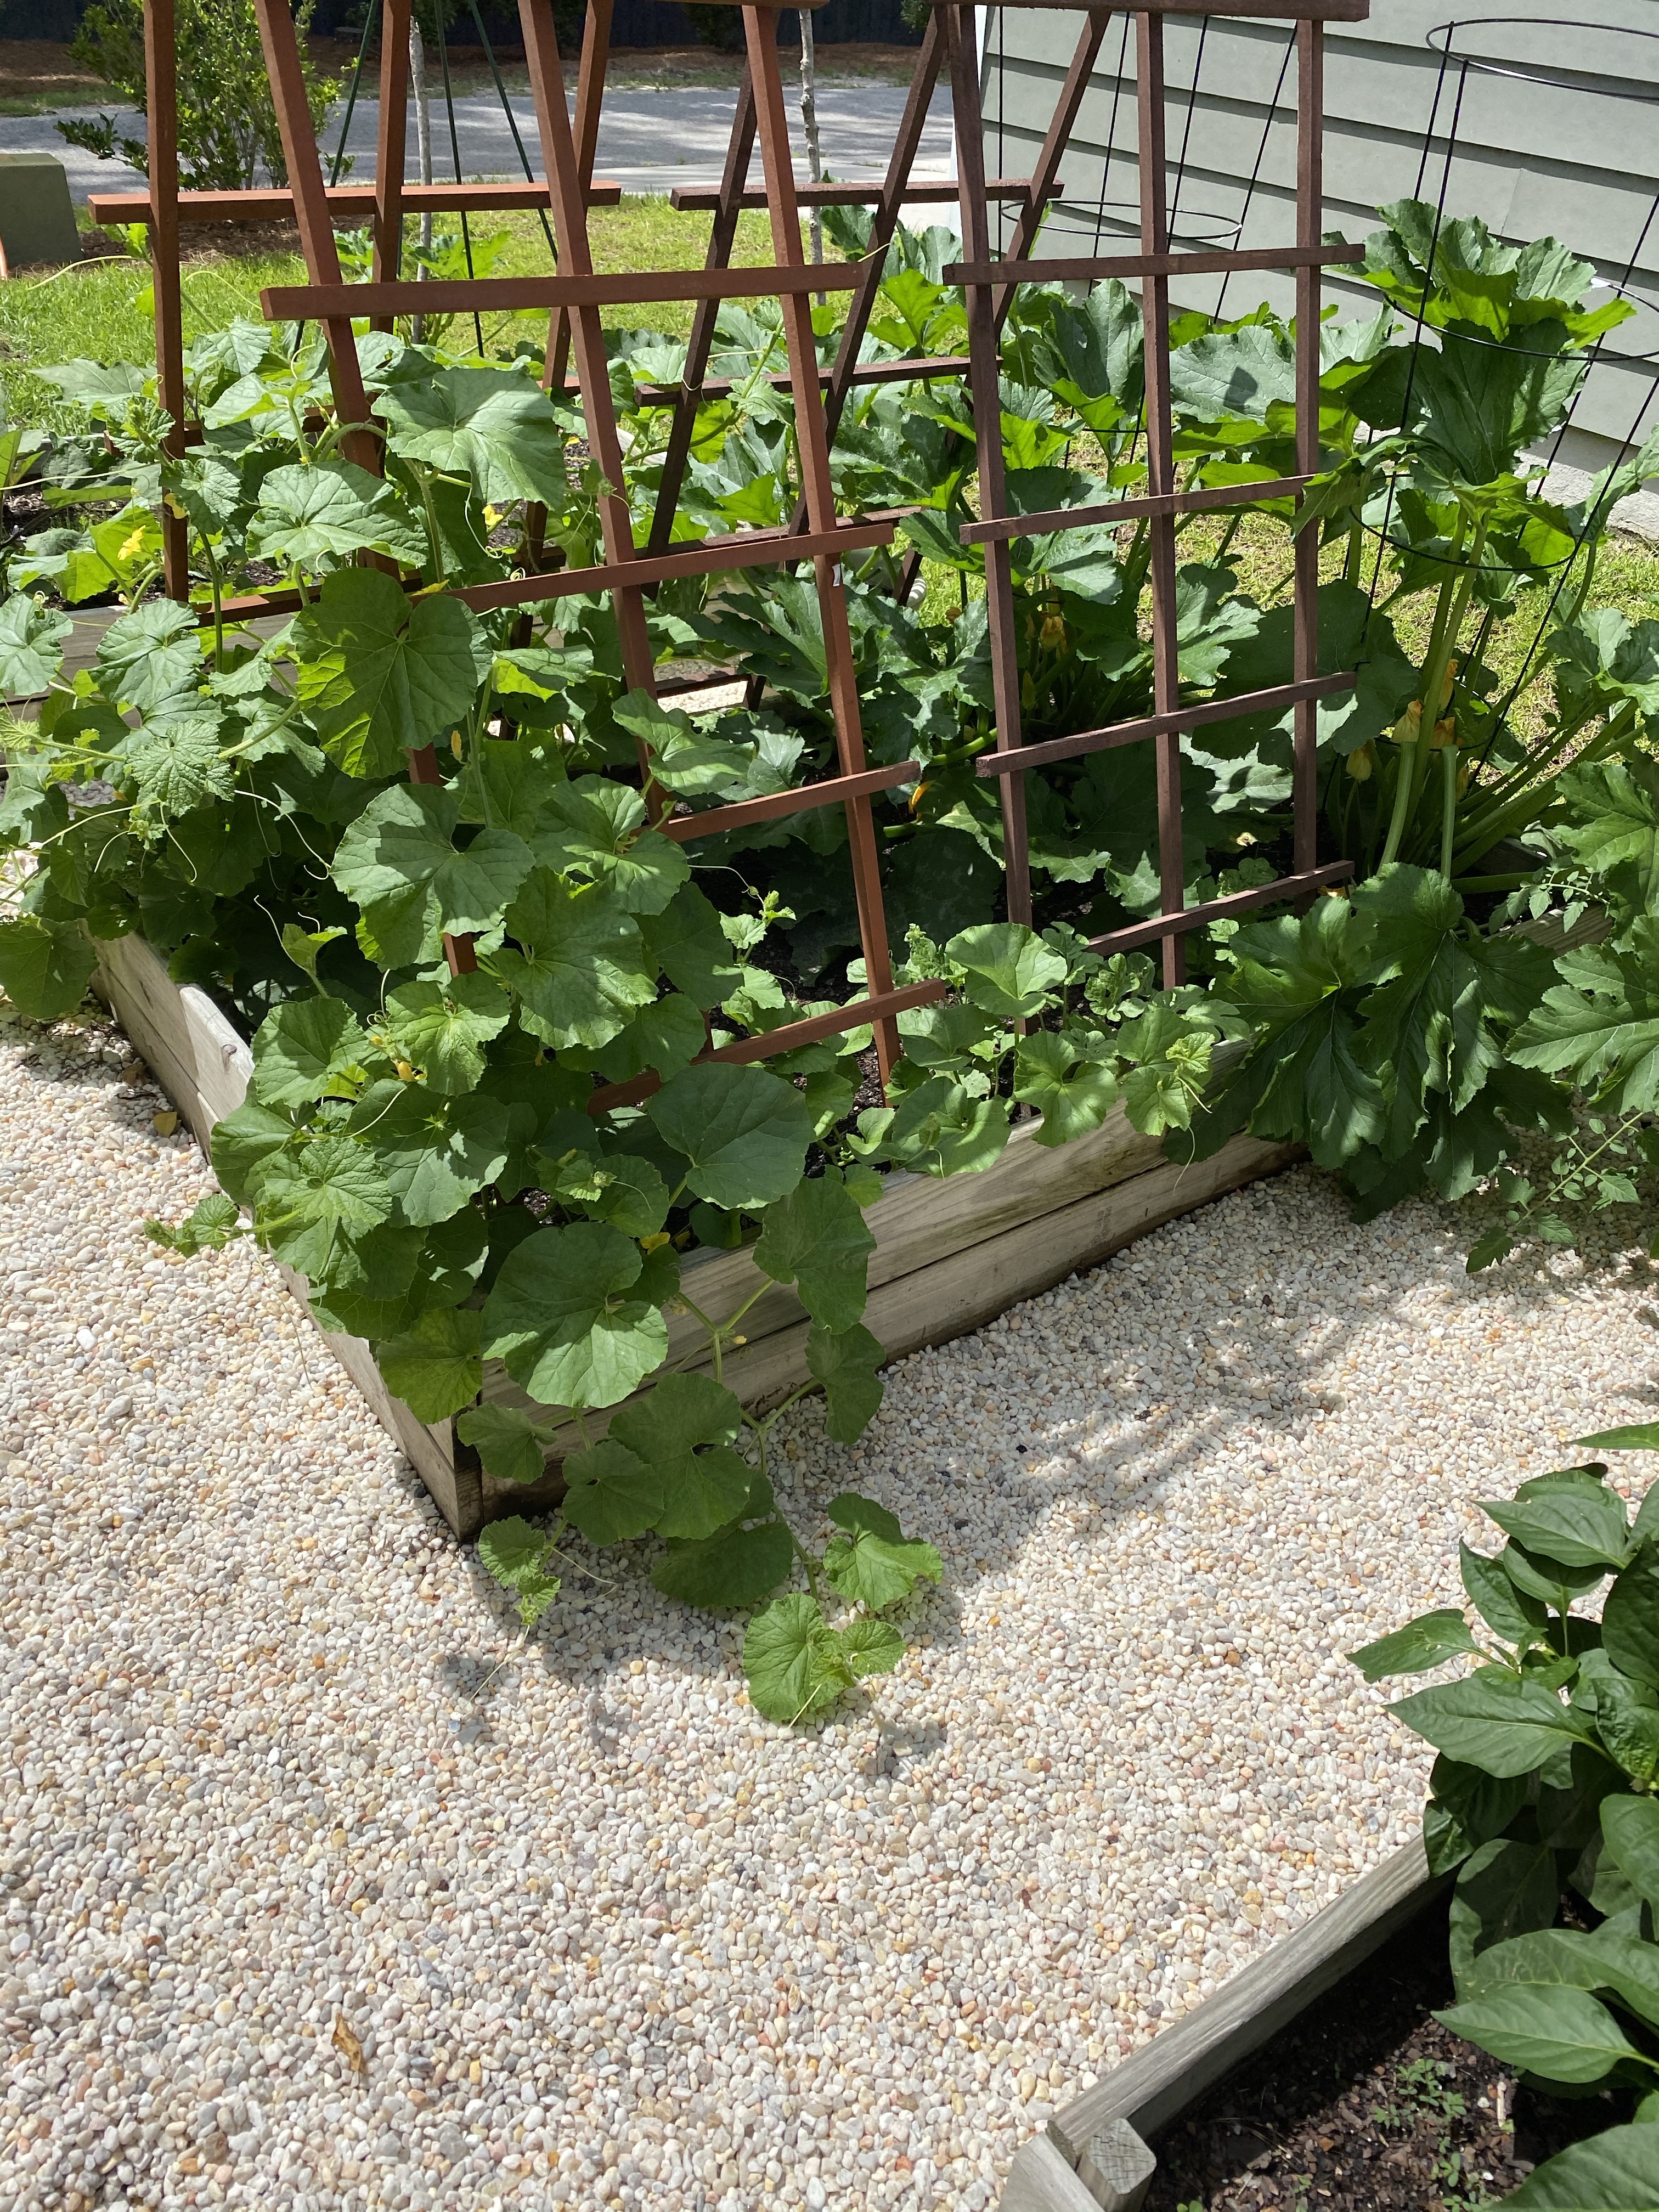
This spring I decided to take advantage of the extra time at home I’ve had to define our garden space a little more. Keeping up with the weeds that sprout around the edges of our beds has been a chore all of its own and the beds are fairly close together which makes mowing between them tricky, so we decided to just…take it all out! We dug out all of the grass surrounding the garden beds and replaced it with this really beautiful river rock.
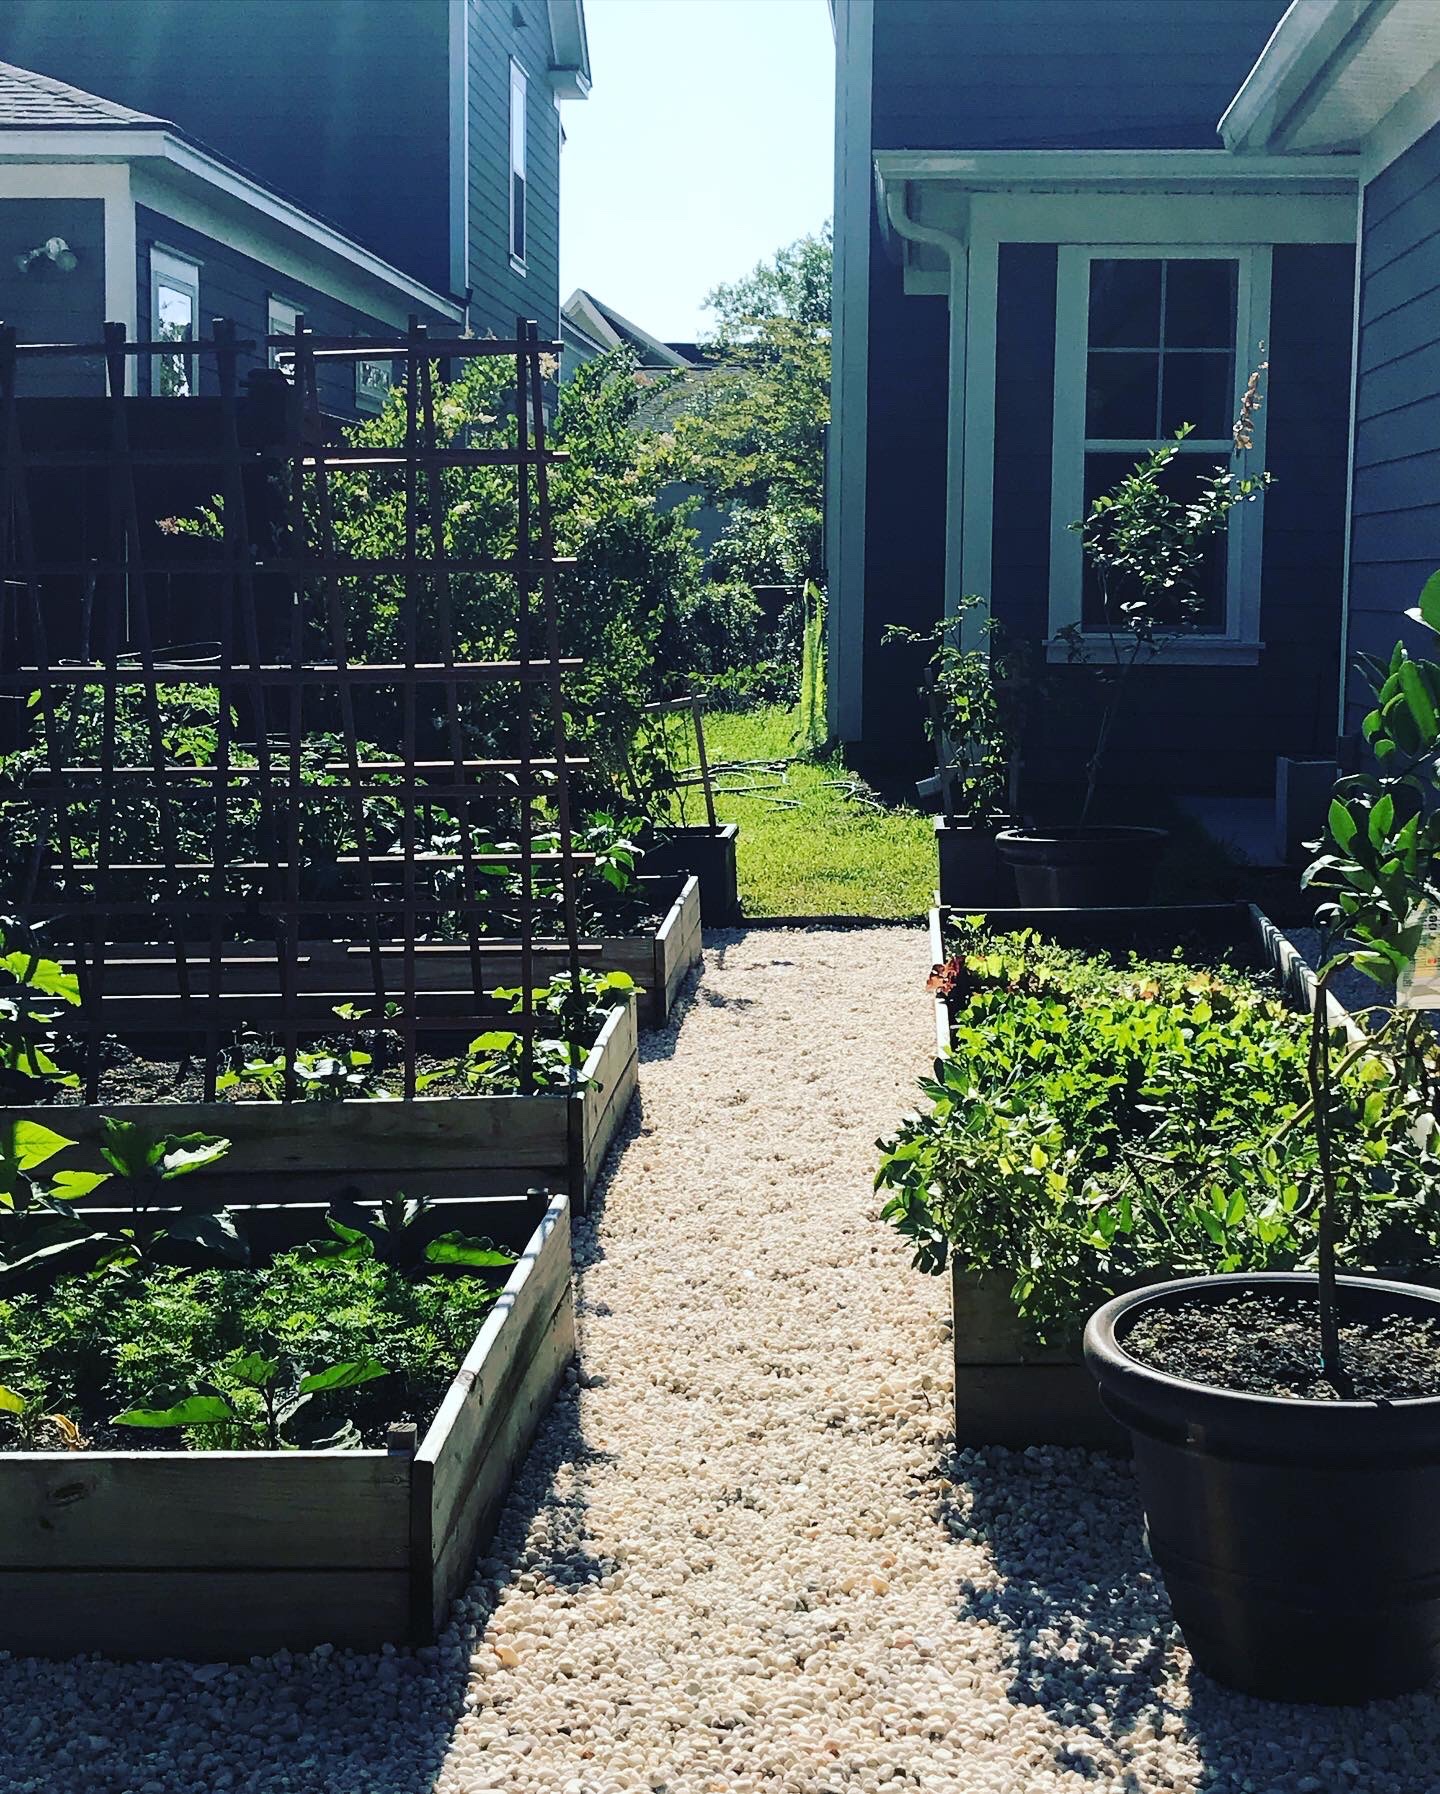
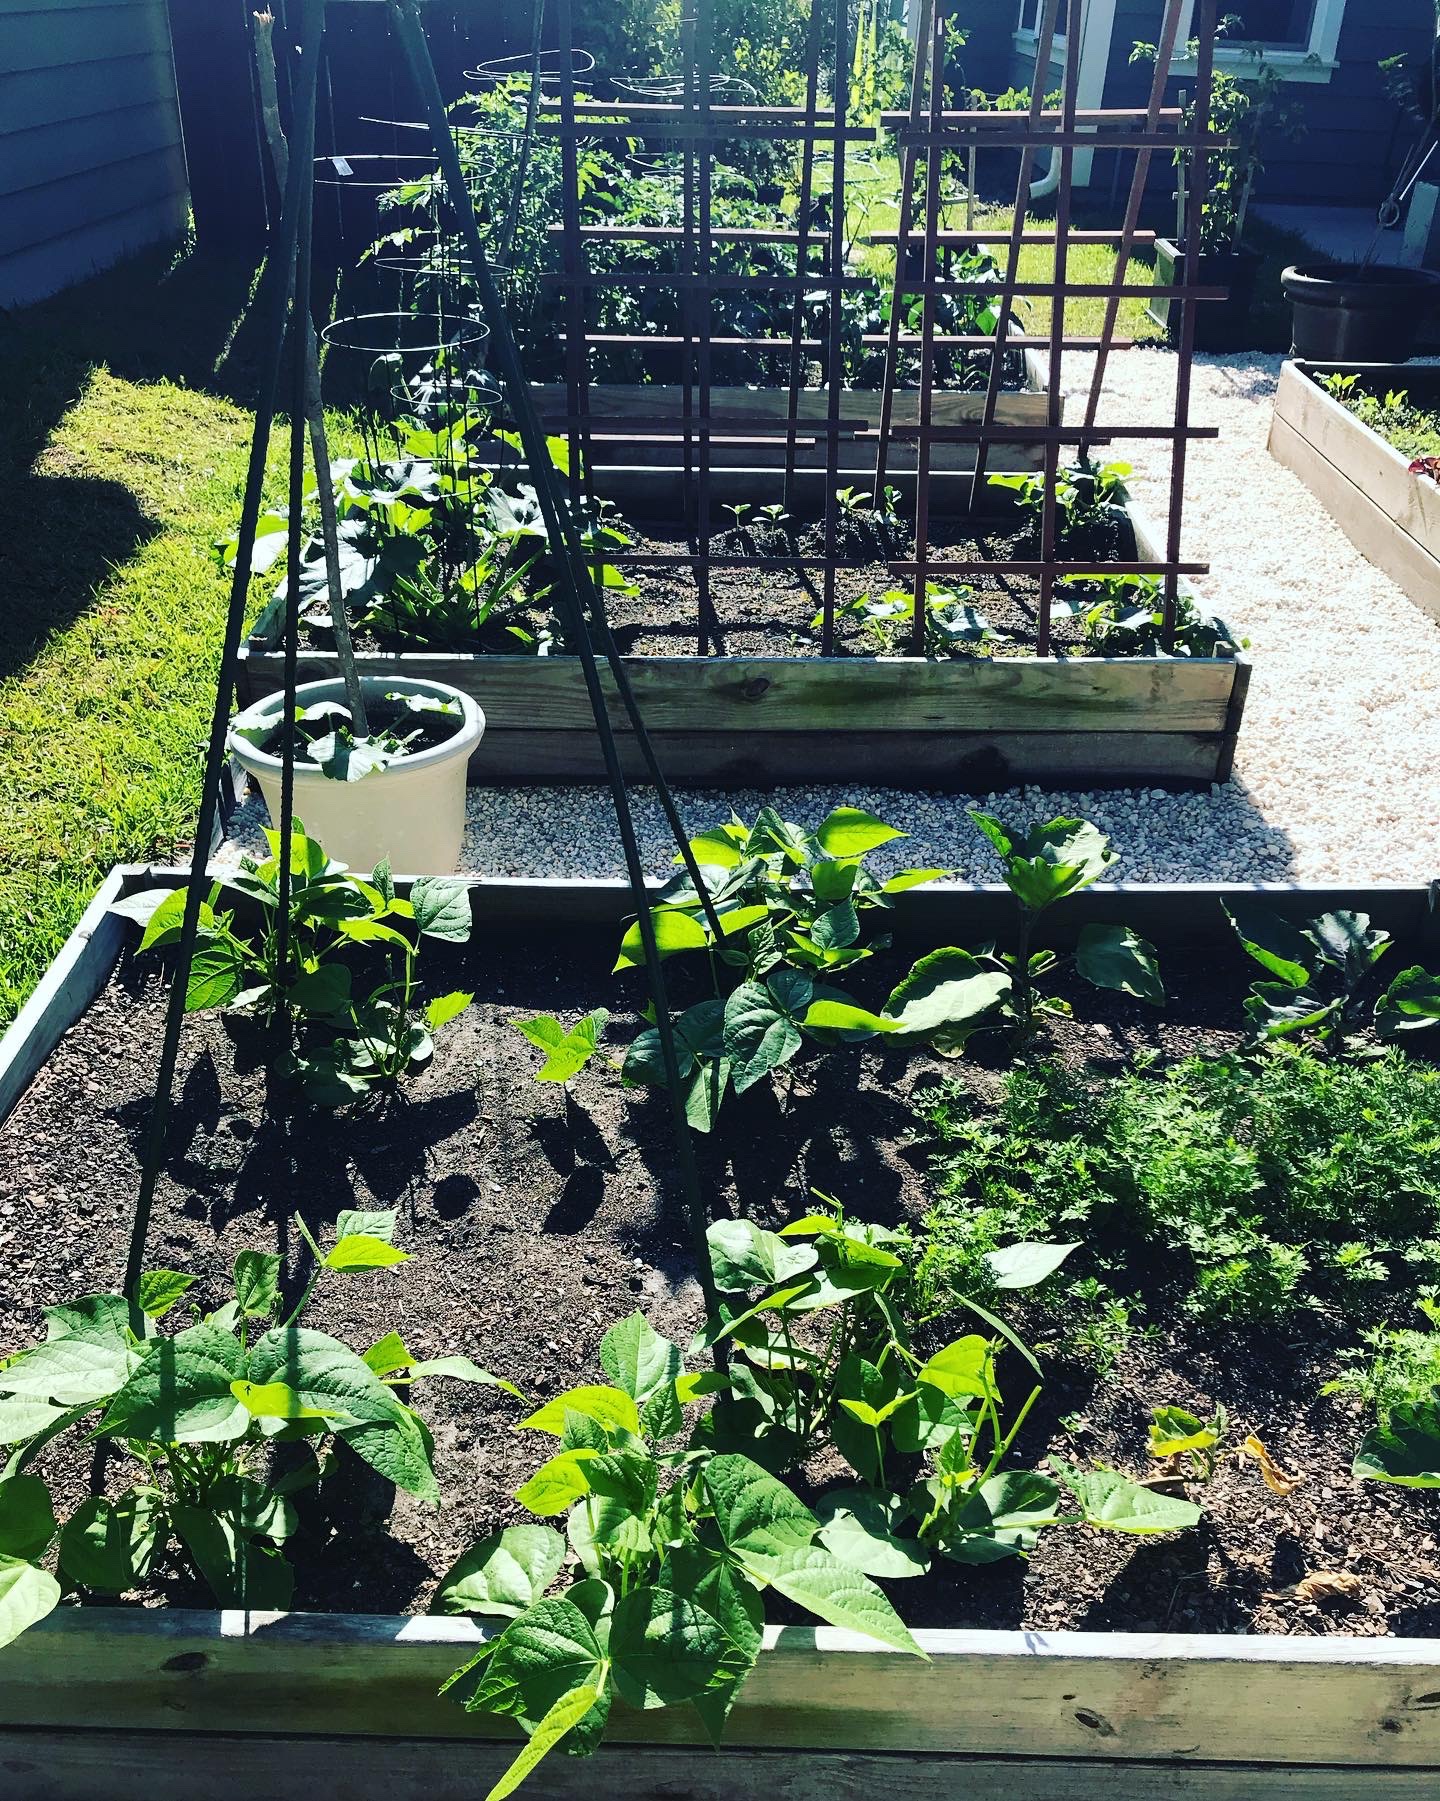
Let me tell you, this change has made a HUGE difference in the overall aesthetic of our garden. And I’m all for spaces being both functional and pretty to look at. I spend a decent amount of time walking back and forth between our kitchen and our garden so I wanted it to be a space that brings a lot of joy.
The job wasn’t without its struggles though. We certainly saved a lot of money by completing the job ourselves (which was the whole point), but it took a lot of hard work. The space that we dug out represents about 180 square feet and we dug about 3 inches down to have space for plenty of rock. That being said, the amount we saved made the effort well worth it. We did originally consider having someone else do the job but when we got the quote we changed our minds pretty quickly. To have this job done by a landscape company was going to cost $1,000+ in labor alone, plus an added $400 – $500 for materials. Given that the whole purpose of the garden is to SAVE us money, paying well over $1,000 to simply have rock laid kind of destroyed the point.
So what was the all-in cost for us to do it ourselves? This job cost us about $200 for all of the materials (landscape edging, landscape fabric, and the rock) + $80 for a pick-up truck rental from Lowe’s to transport the sand and rocks from a local landscaping company. Not too shabby.
Interested in doing something similar? Here is a list of everything you’ll need and the steps you’ll need to take to complete the project:
Tools
- Flat head shovel
- Hose
- Landscape fabric – We used this Sta-Green Premium Landscape Fabric.
- Landscape edging. We used this Landscape Edging Roll from Lowe’s. It comes in 20, 40, or 60 ft quantities.
- Extra landscaping stakes like these: 5-Pack of Metal Landscape Stakes. The landscape edging you purchase will likely have a small number of stakes included, but you’ll need more to ensure that the edging goes in nice and straight.
- Hammer – to hammer in your stakes.
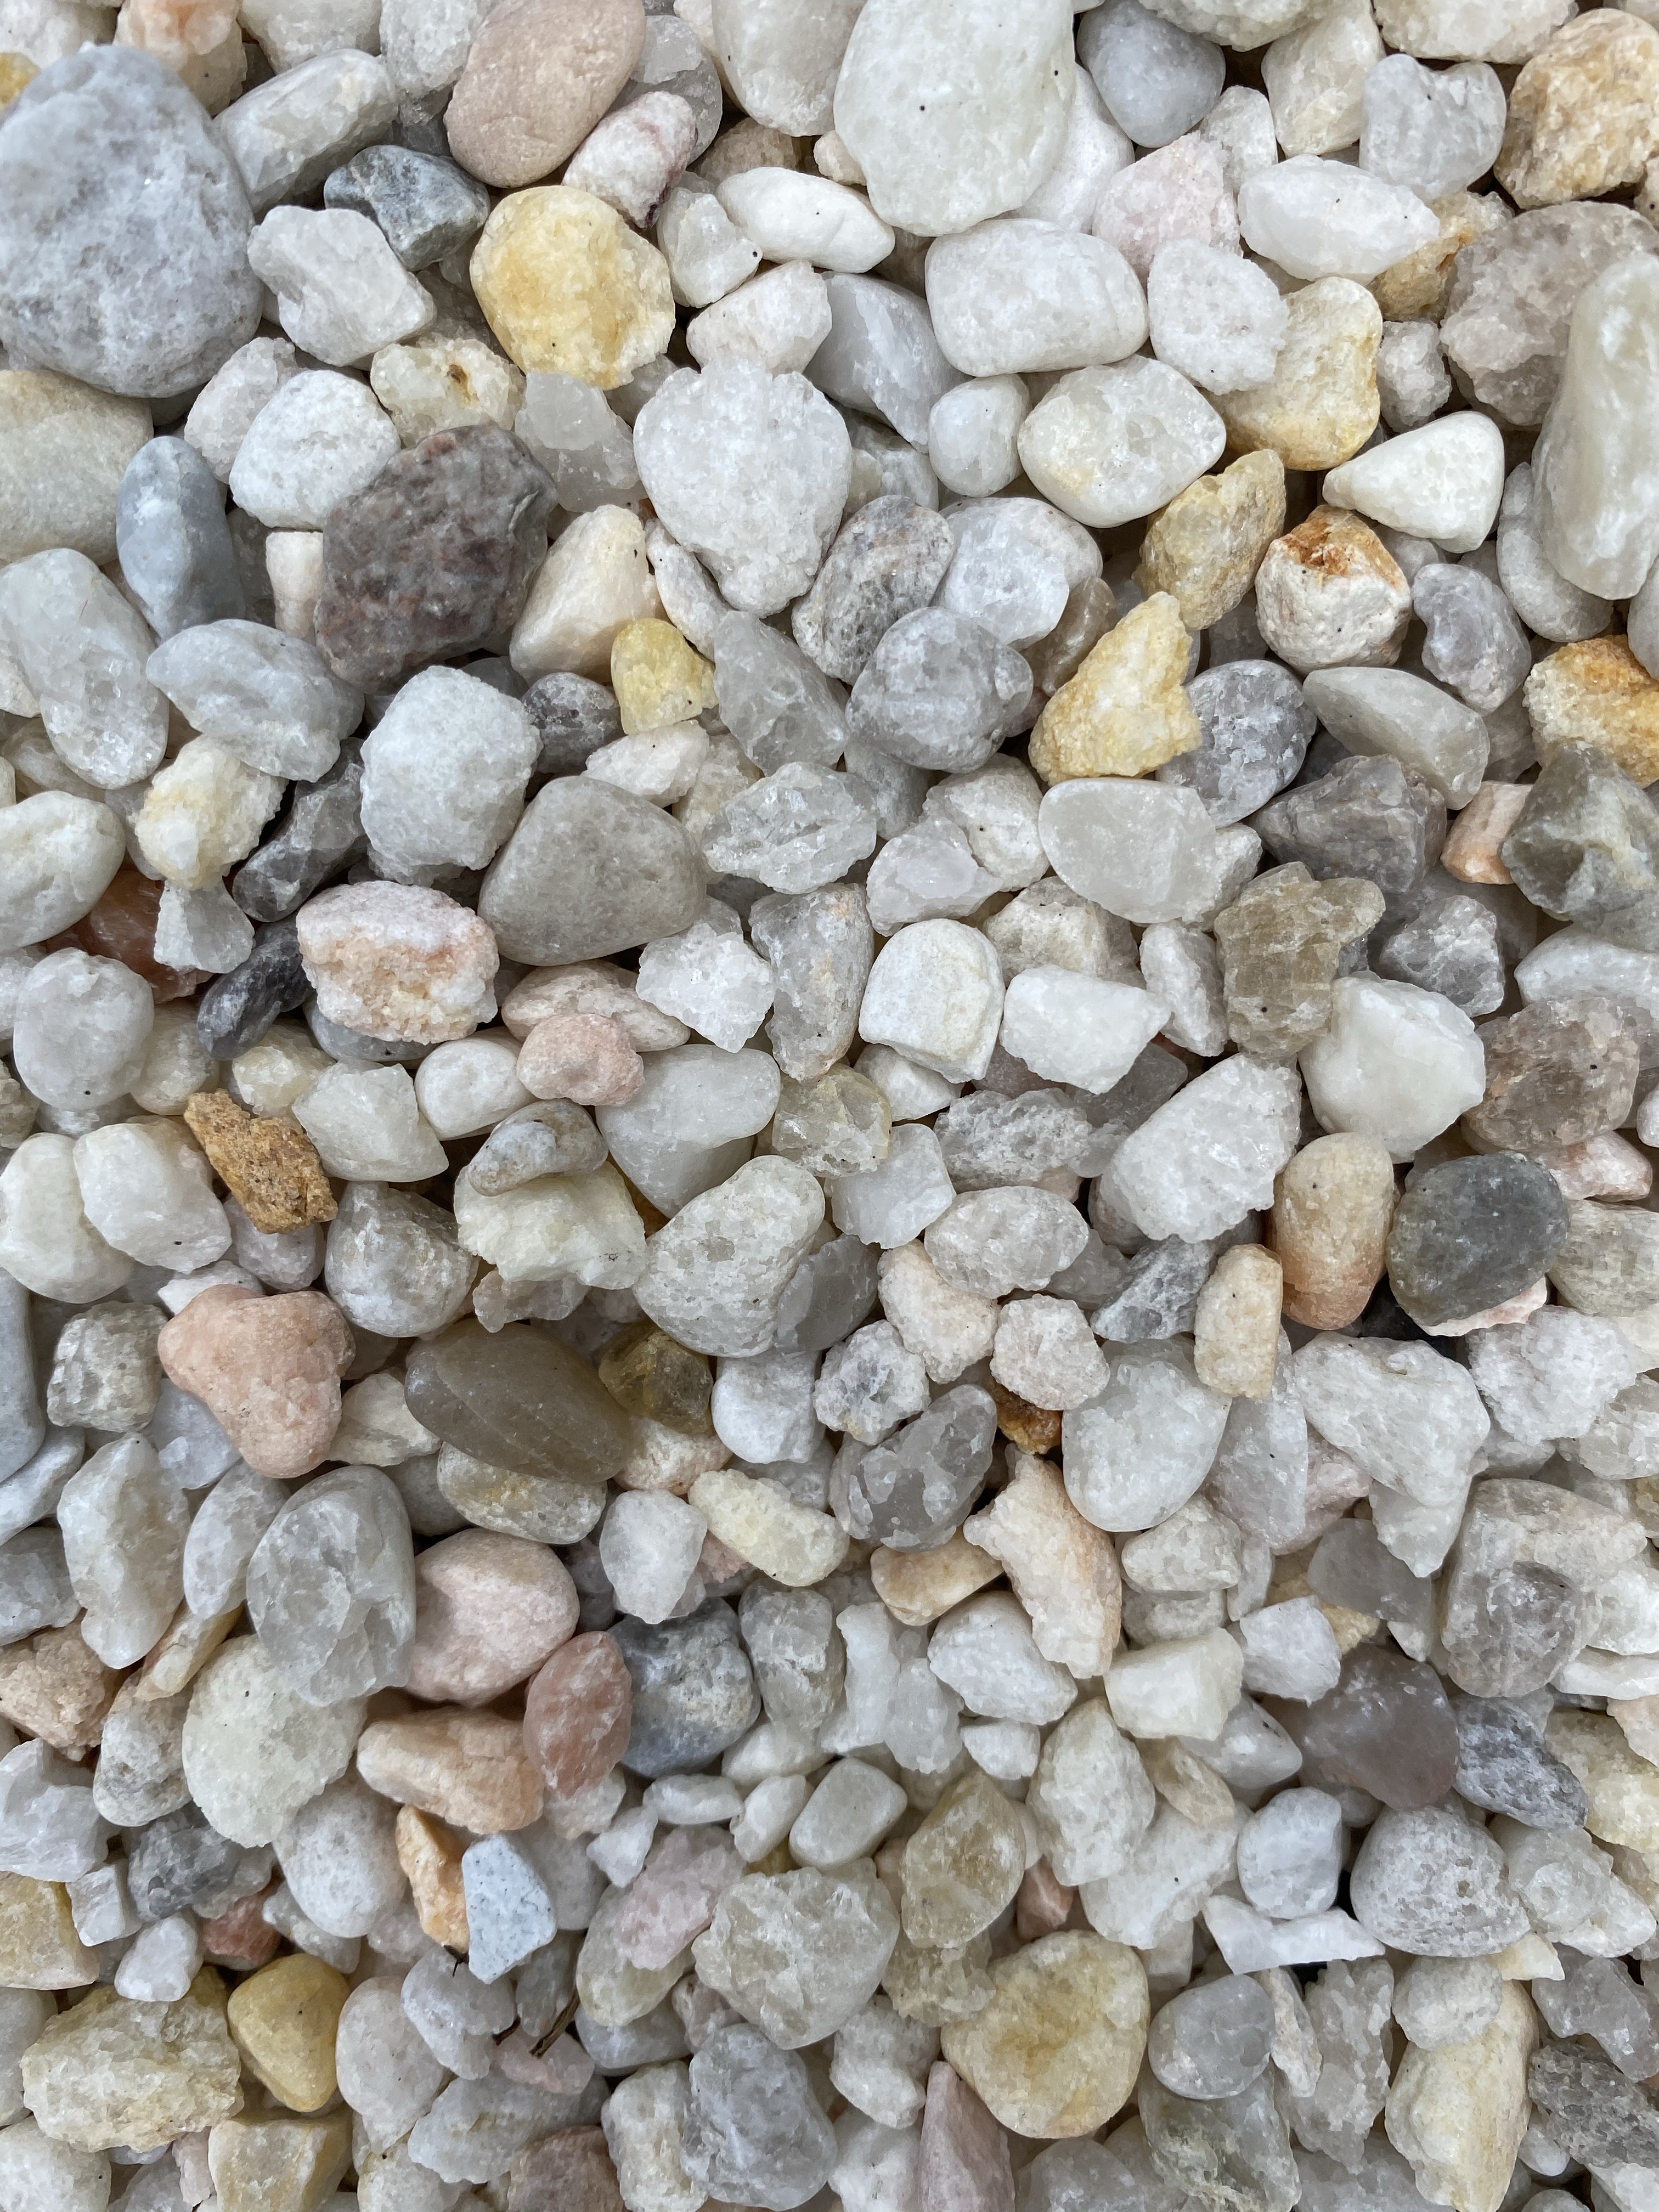
- Rock! We used a little more than one cubic yard of rock, which is enough to cover 162 sq. ft. at a 2-inch depth. We chose to go with a 3/8-inch river rock because the small size made it easy and comfortable to walk on. You should shop around your local landscape supply stores to find the best price/cubic yard.
Steps
Step 1: Mark the space that you want to dig out. We used our hose to make sure that the edges were nice and straight.
Step 2: Using a flat shovel, go along the hose and etch out the edge of your garden space. Once you’re done you’ll be able to remove the hose, but still see the well-defined landscaping edge.
Step 3: Get digging. I would strongly suggest using a tiller to loosen the soil first. Also, make yourself a couple of pitchers of sweet tea because you’re going to need it.
Step 4: Once all the dirt is removed, use landscape stakes to secure the edging along the border of the garden space. The edging should be in line with the grass edge (You don’t want to be tripping over it when you walk in and out of your garden), but for this reason you should be sure that the top of your rock layer hits about 1/4-inch to 1/2-inch below the top of the border so that your rock isn’t spilling out into the yard around your garden.
Step 5: Lay down the landscape fabric, letting it slightly hang over the edge. You can go back with an x-acto knife or scissors later to remove the excess.
Step 6: Pour in the rock and use a rake to make sure that it’s evenly distributed.
And that’s it!

Very good Amy. Your garden area looks great and I know all the produce you get both saves you money on your grocery bill and is healthy and nutritious as well.
LikeLike